


A Review of Model Binding in ASP.NET Razor Pages
In this article, I discuss the process of binding data from a request to the PageModel. Model binding in ASP.NET...

One of my favorite things about working with ASP.NET Core is the framework gives you the ability to pick and choose which ASP.NET Core features you’d like to use in your project. If you start a new project using the Minimal API project type, you are not limited to using Minimal APIs in your project. It is up to you and your team to determine how you want to build the project.
In this blog post, I will discuss how I extended a Minimal API application to support Razor Pages. You may be wondering why I chose to add Razor Pages to a Minimal API project. Let’s jump right into the problem and why Razor Pages was the perfect solution.
I am currently working on the API for a mobile app that I am building. I implemented a feature that allows existing users to invite new users to the app. Basically, the app invitation flow goes as follows:
An existing user sends an invitation to an email address. The existing user must add their name and the recipient’s email address. The user can optionally enter a message to be sent with the email.
The email is sent to the potential new user. The email contains a friendly message letting them know they have been invited by [InsertSendersName] to join MyApp. The invitation URL contains a token stored in the database. The token will be sent to the accept-invitation endpoint as a route parameter.
The user is elated to have been invited and eagerly clicks “Accept Invitation”. A friendly message will be displayed to the user, letting them know the result of their request.
The preceding steps are overly simplified, but that is the general process. Step #3 is what we are focusing on in this post: returning HTML content as opposed to JSON.
Let’s look at how I implemented the original solution with the Minimal API endpoint, and then I will show you the new solution using Razor Pages as a feature of the Minimal API.
app.MapPost("/api/send-invitation", () =>
{
// Logic to send an invitation to a user to sign up for our app
//...
});
app.MapGet("/api/accept-invite/{invitationToken:int}", (int invitationToken) =>
{
// Logic to process the invitationToken
//...
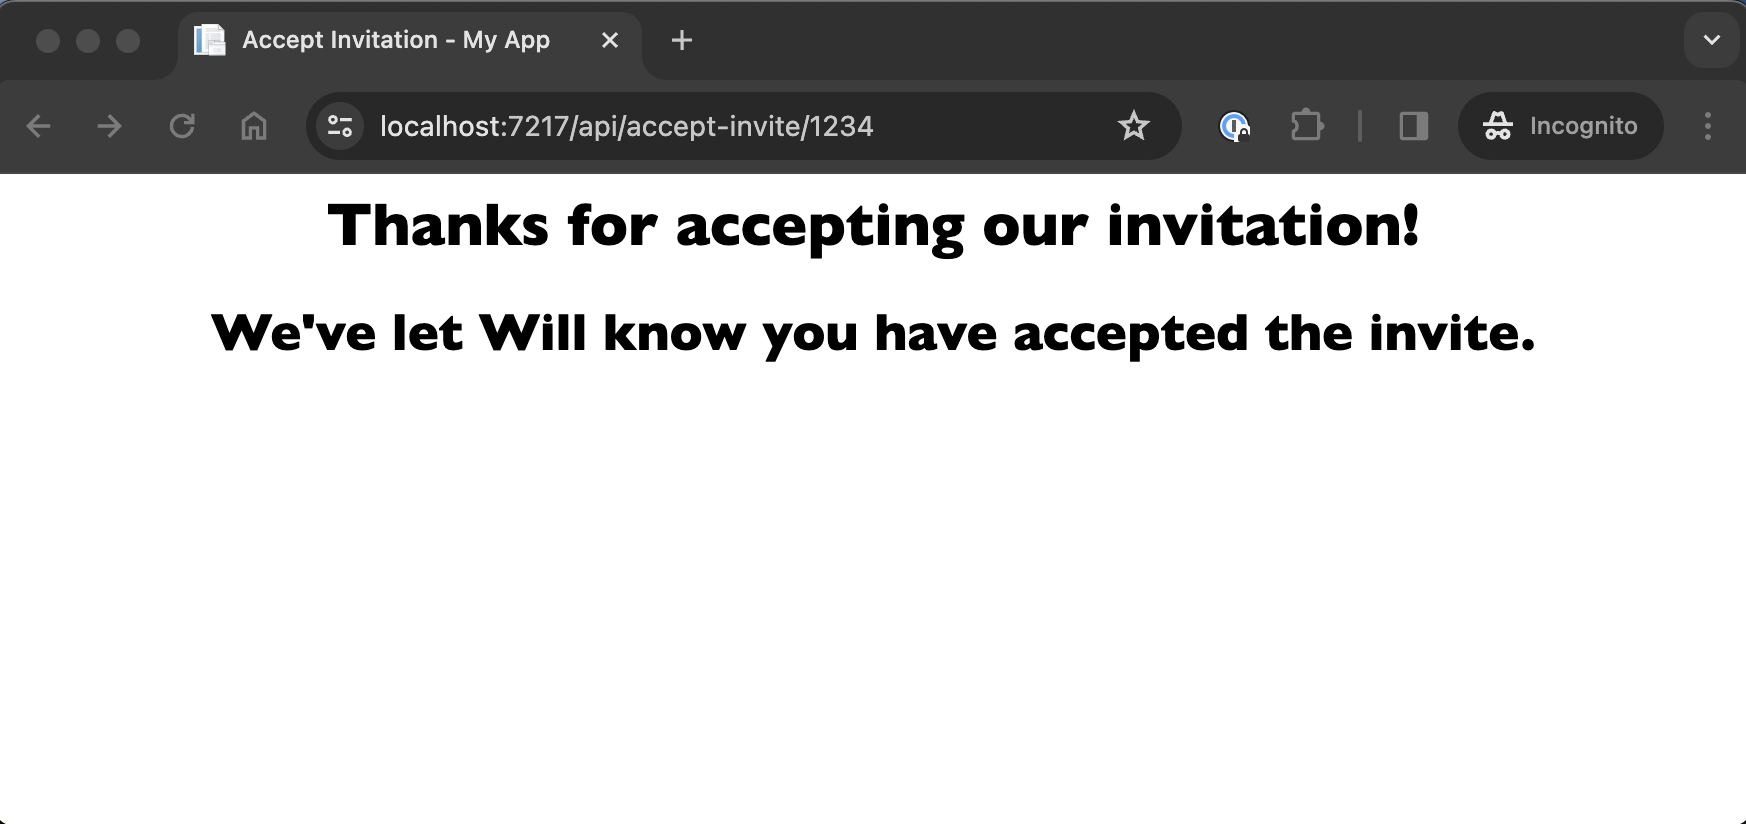
return Results.Content("<h1>Thanks for accepting our invitation!</h1>", "text/html");
});
As you can see, I have simplified the preceding code. By omitting the logic required to send and accept the invitation, we can focus on the topic of this blog post, which is the HTML response.
As mentioned earlier, we can return HTML directly from our API endpoint. In most cases, this may be all that is required to solve the problem at hand. If you only return plain HTML from an endpoint, this is probably the right solution. But what if we want to add dynamic data to our HTML? For example, what if we wanted to pass in the name of the user who sent the invitation and add some styling to match our brand? Consider the following code:
api.MapGet("/api/accept-invite/{invitationToken:int}", (int invitationToken) =>
{
    // Logic to handle the invitation and get the senders name
    //...

    var sender = "Will";
    return Results.Content($"""
                              <head>
                                 <title>Accept Invitation - My App</title>
                              </head>
                              <body style="font-family:Gill Sans, sans-serif; text-align:center;">
                                 <h1 style="font-size:30px;">Thanks for accepting our invitation!</h1>
                                 <h2 style="font-size:26px;">We've let {sender} know you have accepted the invite.</h2>
                              </body>
                            """, "text/html");
});
As you can imagine, the preceding HTML string can quickly grow in complexity, making it harder to work with. What if we wanted to render HTML conditionally? For example, what if the invitation is expired, the token is invalid, or the user already accepted the invitation? We want to communicate the error to the user. I extended my Minimal API project to use Razor Pages to handle the invitation confirmation in a more maintainable way. Razor Pages solve all these problems nicely, thanks to the Razor Template Engine.
The Razor Template engine extends standard HTML, allowing you to write C# code in the same file as your HTML markup. If you are unfamiliar with Razor Pages, you can learn more by visiting Introduction to Razor Pages in ASP.NET Core. Let’s go ahead and improve our solution by adding support for Razor Pages to our Minimal API.
First, we must add the required services for Razor Pages to IServiceCollection.
// Program.cs
builder.Services.AddRazorPages();
Next, we add support for static assets. By default, UseStaticFiles will allow us to serve static files from the wwwroot folder.
// Program.cs
var app = builder.Build();
if (app.Environment.IsDevelopment())
{
    app.UseSwagger();
    app.UseSwaggerUI();
    app.UseExceptionHandler();
}

app.UseStaticFiles(); // new
Next, we need to create a directory called wwwroot and a directory called Pages in the root directory of our project. The wwwroot directory will hold static files such as images, Javascript, and CSS. Another benefit of using Razor Pages to serve our HTML instead of Minimal API endpoints is using proper CSS files instead of including inline styles in the HTML string at the endpoint.
The next step is to create a file called AcceptInvite.cshtml and AcceptInvite.cshtml.cs. If you are using Visual Studio, both files can be created with one action. The file directory should look something like this:
.
├── MyApp.API.csproj
├── MyApp.API.sln
├── Pages
│   ├── Invitation
│   │   ├── AcceptInvite.cshtml
│   │   ├── AcceptInvite.cshtml.cs
│
└── wwwroot
    └── style.css
Because Razor Pages uses folder-based routing. The URL for the accept invitation page will be:
myApp/Invitation/AcceptInvite
Now, we need to migrate our code from the Minimal API endpoint to the Razor Pages. Let’s start with creating a default layout for all of the pages. There is a new folder and file in the Pages directory called Shared/_Layout.cshtml, which represents the default layout for this project.
.
├── MyApp.API.csproj
├── MyApp.API.sln
├── Pages
│   ├── Invitation
│   │   ├── AcceptInvite.cshtml
│   │   ├── AcceptInvite.cshtml.cs
│   └── Shared
│       └── _Layout.cshtml
└── wwwroot
    └── style.css
/Pages/Shared/_Layout.cshtml.cs
<!DOCTYPE html>
<html lang="en">
<head>
    <meta charset="utf-8"/>
    <meta name="viewport" content="width=device-width, initial-scale=1.0"/>
    <title>@ViewData["Title"] - MyApp</title>
    <link rel="stylesheet" href="~/MyApp.styles.css" asp-append-version="true"/>
</head>
<body>
<div class="container">
    <main role="main" class="pb-3">
        @RenderBody()
    </main>
</div>
</body>
</html>
Any pages that use the default layout _Layout will be rendered in place of the @RenderBody() method. Let’s move the inline styles from our HTML string to the style.css file.
/wwwroot/style.css
body {
  margin-bottom: 60px;
  font-family:Gill Sans, sans-serif;
  text-align:center;
}

h1 {
  font-size: 30px;
}

h2 {
  font-size: 26px;
}
Next, the code behind the Razor Page:
using Microsoft.AspNetCore.Mvc.RazorPages;

namespace MyApp.Pages;

public class IndexModel : PageModel
{
    private readonly ILogger<IndexModel> _logger;

    public bool ValidInvitation { get; set; } = true;
    public bool ExpiredInvitation { get; set; }
    public bool AcceptedInvitation { get; set; }

    public IndexModel(ILogger<IndexModel> logger)
    {
        _logger = logger;
    }

    public void OnGet()
    {
        // Logic to get status of the invitation and update the properties accordingly

        // Logic to get the sender
        ViewData["Sender"] = "Will"; // For demo purposes only
    }
}
Again, the code is simplified to focus on the topic of this post, which is returning an HTML response. Three properties will be used to conditionally render the appropriate response. The Sender name is also assigned to the ViewData dictionary. That brings us to the Razor Page.
@page
@model MyApp.Pages.IndexModel
@{
    ViewData["Title"] = "Accept Invitation";
}

@if (Model.ValidInvitation)
{
    <h1>Thanks for accepting our invitation!</h1>
    <h2>We've let @ViewData["Sender"] know you have accepted the invite.</h2>
    return;
}

@if (Model.ExpiredInvitation)
{
    <h1>Invitation Expired</h1>
    return;
}

@if (Model.AcceptedInvitation)
{
    <h1>You're In!</h1>
    <h2>You've already accepted this invitation</h2>
}
Since we assigned ValidInvitation with a default value of true. We expect to see the message defined in the first scope to be displayed to the user.
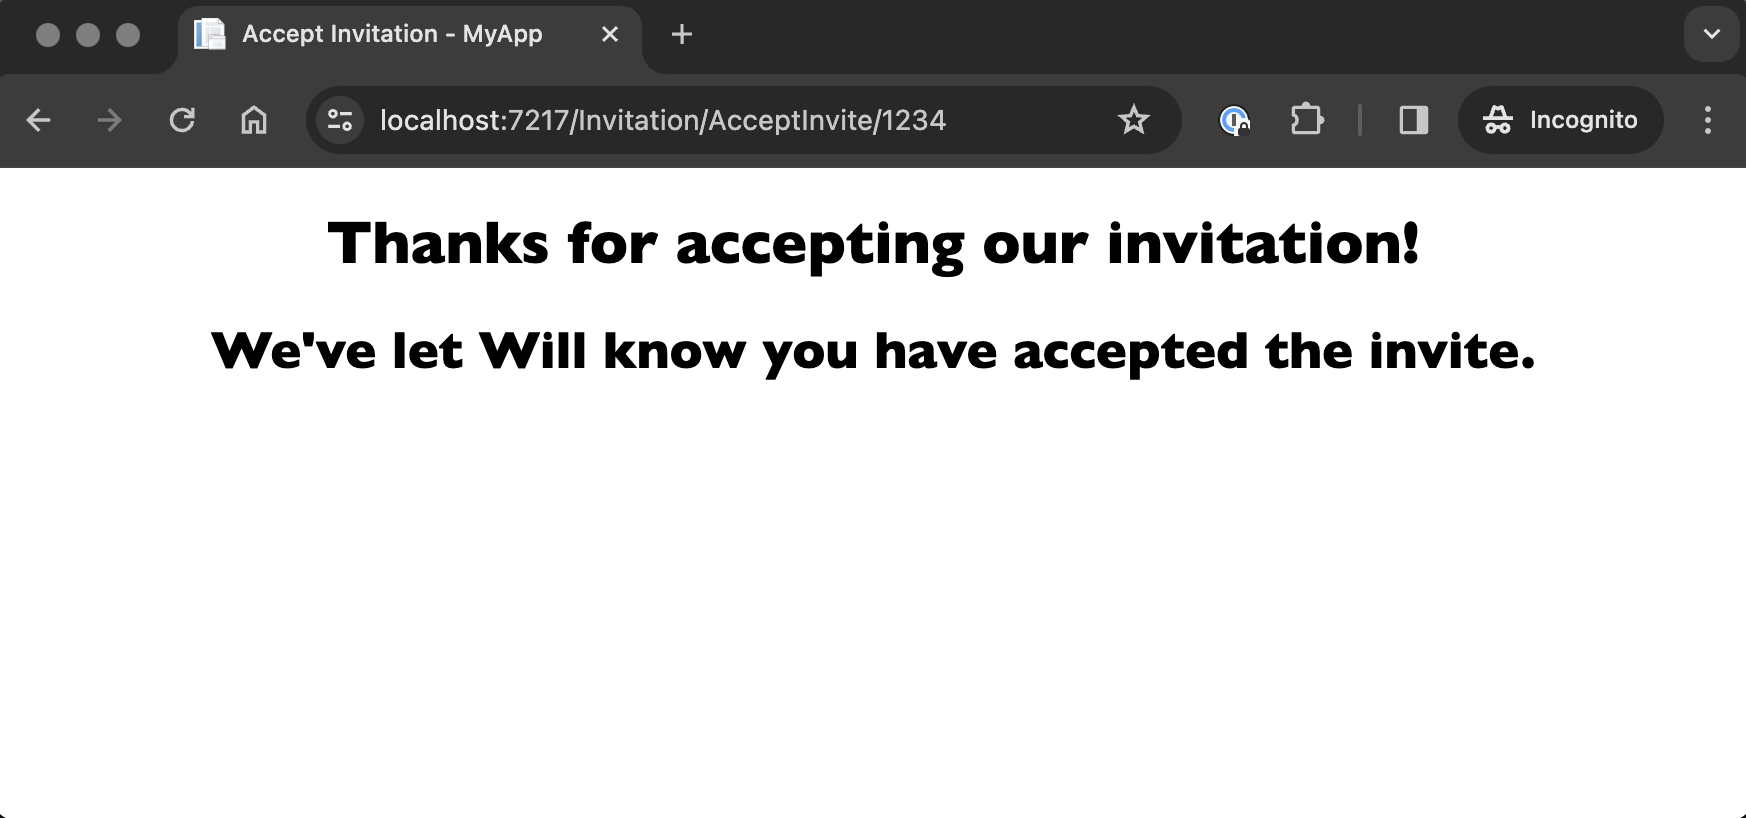
It works! Notice the new URL.
In this post, we evaluated two ways to render HTML in response to a GET request in a ASP.NET Core project. I explained how you can return HTML from a Minimal API endpoint. I then showed you that you can achieve the same result in a Minimal API project using Razor Pages. Thanks for reading!
In this article, I discuss the process of binding data from a request to the PageModel. Model binding in ASP.NET...